
Yes, you can grow Hatch chiles in California, and in most parts of the state they perform remarkably well. The Central Valley, Southern California, and the Inland Empire give you growing conditions that closely mimic the Hatch Valley's heat and sunshine. Coastal gardens can do it with a warm microclimate and some season-extension tricks. Mountain zones above 4,000 feet and foggy coastal belts are the toughest spots, but even there containers and low tunnels make it workable. The short version: if you get 90 to 120 warm, sunny days and can keep night temperatures reasonably cool, you are in business.
Can You Grow Hatch Chiles in California? Regional Guide
Marcus Holloway
12 Jul 2026
Region-by-region verdict for California
California is not a single climate. Before diving into the how-to, here is a quick feasibility snapshot by region so you can figure out where you actually stand.
| Region | Feasibility | Main challenge | Quick strategy |
|---|---|---|---|
| Central Valley (Sacramento, San Joaquin) | Excellent | Summer highs above 100°F can stress fruit set | Afternoon shade cloth, consistent irrigation |
| Southern California / Inland Empire | Excellent | Hot dry Santa Ana winds cause blossom drop | Windbreaks, mulch, deep watering |
| Coastal (Santa Barbara north to SF Bay) | Good with effort | Cool summers, marine layer delays ripening | South-facing walls, dark containers, row cover |
| Southern Coast (San Diego, LA Basin) | Good | Mild but sometimes too-cool nights in spring | Start transplants early indoors, black plastic mulch |
| Mountain / Sierra foothills (2,000–4,000 ft) | Moderate | Short frost-free season, cool nights | Early start indoors, use fastest-maturing cultivars |
| High mountain / above 4,000 ft | Difficult | Fewer than 90 frost-free days in many spots | Large containers moved indoors or unheated greenhouse |
| Low desert (Coachella, Imperial Valley) | Excellent spring, brutal midsummer | Extreme heat (110°F+) stops fruit set | Early-season planting, provide shade in July–August |
What actually makes a chile a 'Hatch' type, and the climate it needs
The term 'Hatch chile' is more of a marketing geography than a single variety. What people mean is a New Mexico-type Capsicum annuum: long, mildly hot, thick-walled pods bred specifically for roasting. The breeding programs at New Mexico State University (NMSU) produced the lineup most growers recognize, including NuMex Big Jim, NuMex Joe E. Parker, and NuMex Sandia Select. These cultivars were developed for the Hatch Valley, which sits at roughly 4,000 feet elevation with hot days, cool nights, and low humidity. That diurnal temperature swing of 30°F or more is partly responsible for thick pod walls, good sugar development, and the flavor people chase.
Practically speaking, here are the climate numbers that matter for fruit set and pod quality. Daytime temperatures should stay between about 75°F and 90°F for optimal flowering; research published in Scientia Horticulturae shows that sustained night temperatures at or above roughly 70°F (21°C) measurably increase blossom drop and reduce fruit set. More recent work in Horticulture Research puts the upper threshold for daytime heat at around 91°F (33°C) before pollen viability starts to drop. That Central Valley summer stretch above 100°F is genuinely a problem, but it is manageable with shade cloth and irrigation. Frost kills pepper plants outright, and soil temperature below 60°F slows root development dramatically. Germination requires soil at 75°F to 85°F; below that, seeds stall and rot. Most NuMex cultivars run 75 to 90 days from transplant to green harvest and 100 to 120 days to red-ripe, so you need a frost-free window of at least 90 days, and 110 or more is far more comfortable.
Using USDA zones and California microclimates to plan your crop
California spans USDA Hardiness Zones 5b (high Sierra) through 11a (low desert). For chile peppers, the hardiness zone is less important than the heat accumulation and frost-free season length, but it is still a useful starting reference. Zone 9 and warmer covers most of the Central Valley, Southern California, and the coast south of Point Conception, and those are your most reliable growing areas. Zone 8 covers many Bay Area valleys and foothills, where peppers work but the season is tighter. Zones 6 and 7 in foothill and mountain areas can still produce peppers with early transplants and season extension.
More useful than hardiness zones for peppers is your local last spring frost date and first fall frost date, which you can look up by zip code through NOAA's freeze climatology data. In Fresno, the average last spring frost is around February 20, and the first fall frost is around December 1, giving a 280-plus-day season. In San Jose, last frost is around February 15 with a first fall frost around December 10. In Sacramento it's closer to February 17 and December 1. Contrast that with South Lake Tahoe at 6,200 feet, where the last frost is late May and the first fall frost is early September, barely 90 frost-free days. Coastal microclimates add another layer: a garden in Santa Monica with a south-facing wall and dark paving can be 10 to 15°F warmer than a shaded garden two blocks away, and that gap can be the difference between a productive chile plant and a scraggly one.
Best Hatch-type cultivars for California gardens
The NMSU Chile Pepper Institute's cultivar circular (CR-706) documents the full NMSU breeding lineup. For California conditions I keep coming back to a handful of proven performers. If your season is long and hot, NuMex Big Jim is the classic: pods reach 8 to 12 inches, walls are thick, heat runs around 6,500 SHU, and it is exactly what you picture when you think Hatch green chile. NuMex Joe E. Parker is similar but slightly hotter and a bit more consistent in coastal areas where summer is cool. For growers who want more kick, NuMex Sandia Select comes in around 9,500 SHU with good disease tolerance. For short-season mountain or coastal spots, look for faster-maturing NuMex selections sometimes sold simply as 'New Mexico 6-4 Heritage' or 'Anaheim NM'; these can reach green harvest in 75 to 80 days from transplant. 'Barker's Hot' is another NM-type that performs reliably in California's drier inland valleys.
Where to get seed and transplants: the NMSU Chile Pepper Institute sells authentic NuMex seed directly. Seed Savers Exchange, Rancho Gordo, and Baker Creek Heirloom Seeds carry several NM-type varieties. For transplants, Mexican nurseries and specialty Hispanic grocery stores in Southern California and the Central Valley often stock NM-type seedlings in spring. Kitazawa Seed (Oakland) is an excellent California-based source with good regional germination rates. If you're ordering online, have seeds in hand by January for the Central Valley and Southern California, and by February at the latest for other regions.
Picking the best spot in your yard or on your farm
Hatch-type chiles need full sun, meaning at least 8 hours of direct sunlight per day. In coastal and Bay Area gardens, south-facing slopes or walls are essential; a south-facing stucco wall radiates stored heat at night and can keep nighttime temperatures 5 to 10°F warmer than open ground nearby. In the Central Valley and Southern California, you want to think about afternoon shade in July and August when temperatures regularly push past 100°F. A shade cloth at 30 to 40 percent blocking on the west side of a planting reduces afternoon heat stress without cutting the morning sun that drives photosynthesis.
Windbreaks matter more than most growers expect. Santa Ana winds in Southern California and the Delta breeze in the Central Valley can desiccate flowers and trigger rapid blossom drop. A solid fence, a row of taller plants, or even a temporary burlap screen on the prevailing-wind side makes a real difference. In cooler coastal areas, dark-colored containers like black plastic pots absorb solar radiation and warm the root zone by 5 to 15°F above ambient soil temperature, which can be the deciding factor in fruit set.
Getting your soil right for the best flavor
NM-type chiles want well-drained, loamy soil with a pH between 6.5 and 7.0. California's soils vary enormously: sandy soils in coastal areas and river bottoms drain fast but retain little fertility; heavy clay soils in parts of the Central Valley stay waterlogged in early spring and crack in summer. Either extreme hurts chiles. Raised beds filled with a mix of native soil, compost, and coarse sand or perlite give you the most control, and I use them in my own garden for any pepper I want to produce well.
Before planting, work in 3 to 4 inches of finished compost. A pre-plant balanced fertilizer (something like 10-10-10) at about 2 pounds per 100 square feet gives the plants a strong start. During the season, nitrogen management matters: research summarized by the University of Florida's IFAS program shows that most pepper crops plateau in yield somewhere between 120 and 200 pounds of nitrogen per acre. For a home garden bed, that translates roughly to topdressing with a balanced slow-release granular every 3 to 4 weeks through the fruiting period. Avoid heavy nitrogen late in the season; it pushes vegetative growth at the expense of pod development. Mulch the bed heavily (3 to 4 inches of straw or wood chips) to moderate soil temperature, conserve moisture, and suppress weeds.
Starting seeds indoors: timing and technique
Pepper seeds germinate best at soil temperatures between 75°F and 85°F. At room temperature in a California home in January or February, that means using a heat mat set to 80°F under your seed trays. Without supplemental heat, germination slows to 3 weeks or more and germination rates drop. With a heat mat and fresh seed, you should see sprouts in 7 to 14 days. Sow seeds about a quarter inch deep in a sterile germination mix in 72-cell or 128-cell plug trays.
The standard recommendation across most university extension programs is to start pepper seeds 8 weeks before your expected last frost date, which gives you a finished transplant ready to go outdoors. Alabama Cooperative Extension's transplant production guidelines target 6 to 9 weeks for pepper plug finish time, with growing-on temperatures of 65 to 75°F during the day and 60 to 65°F at night after germination. Oregon State University Extension consistently recommends 8 weeks as the practical indoor lead time for peppers. Pot up into 3-inch or 4-inch containers when the first true leaves appear, and do not rush transplanting outdoors. Harden off transplants over 7 to 10 days by setting them outside in a sheltered spot for a few hours each day, gradually increasing exposure. Transplants put into cold soil below 60°F will sulk for weeks and rarely catch up to plants set out at the right time.
Planting calendar by California region
Here is a practical planting calendar tied to real frost dates and soil-temperature thresholds across the major California growing regions. All transplant dates assume you are setting out hardened-off transplants with soil temperature at 65°F or above.
| Region | Start seeds indoors | Transplant outdoors | First green harvest (est.) | First fall frost (avg.) | Notes |
|---|---|---|---|---|---|
| Central Valley (Fresno, Sacramento, Stockton) | Late January to early February | Late March to mid-April | Late June to mid-July | Late November to December | Use shade cloth in July–August when highs exceed 100°F |
| Southern CA / Inland Empire (Riverside, San Bernardino) | Late January to early February | Mid-March to early April | Mid-June to early July | November to December | Watch for Santa Ana winds; mulch heavily |
| LA Basin / San Diego coast | Early to mid-February | Early to mid-April | Late June to late July | Late November to January | Black plastic mulch accelerates soil warming |
| Central coast / Bay Area (Santa Cruz, San Jose) | Mid-February to early March | Late April to mid-May | Late July to late August | December to January | South-facing walls critical; row cover for cool nights |
| Northern coast (SF, Marin, Monterey) | Late February to mid-March | Mid-May (after soil warms) | August to September | November to December | Marine layer limits heat; fastest-maturing cultivars only |
| Sierra foothills (1,000–2,500 ft) | Early to mid-February | Late April to early May | Late July to mid-August | October to November | Watch spring frost; low tunnels extend season |
| Mountain / upper foothills (2,500–4,500 ft) | Late January to early February (indoor) | After last frost, late May | August | Early to mid-October | NM 6-4 Heritage or Joe E. Parker for speed; containers recommended |
| Low desert (Coachella, Imperial, Yuma border) | December to early January | February to early March | May to early June | November to December | Plant early to fruit before peak summer heat; use shade in July–August |
For the low desert, a fall planting in late August or early September can also produce a second harvest before the first frost, since desert nights cool enough in October and November to encourage fruit set again after the brutal midsummer pause. In the Central Valley, if you are trying for red-ripe pods for drying or powder, count on leaving plants in the ground through October or even into November, well past your first green harvest.
Spacing, irrigation, and fertilizing through the season
In-ground spacing for NM-type chile plants is typically 18 inches between plants, 30 to 36 inches between rows. This allows enough airflow to reduce fungal disease risk while keeping the canopy dense enough to shade the soil and moderate root-zone temperatures. In raised beds, 18-inch square spacing works well. Container growing in the Central Valley and Southern California is completely viable: use 5-gallon containers at minimum, and 7- to 15-gallon pots produce noticeably bigger plants and heavier yields.
Irrigation is critical. California's summers are bone dry, and chile peppers cannot tolerate drought stress during flowering and pod fill without losing blossoms and developing thin walls. Drip irrigation is the most efficient delivery method and is standard practice in California commercial pepper production according to UC ANR Publication 7244. The California Irrigation Management Information System (CIMIS) provides reference evapotranspiration (ETo) readings by station across the state, which you can combine with a pepper crop coefficient (Kc, roughly 0.6 during early growth climbing to about 1.05 at peak) to dial in how much water your plants actually need each week. For home gardeners, a practical rule is to water deeply 2 to 3 times per week in the Central Valley summer heat, keeping the top 12 inches of soil consistently moist but never waterlogged.
Side-dress with a balanced granular fertilizer when the first flowers appear, and again when pods start to size up. If you see dark green leaves and heavy vegetative growth with few flowers, back off nitrogen and let the plant shift energy to reproduction. A light application of calcium and magnesium (either through a dolomitic lime side-dressing or a foliar spray of Epsom salt at 1 tablespoon per gallon) helps prevent blossom end rot, which occasionally shows up in California's hot, fast-drying soils.
Common pests and diseases in California, and how to handle them
Peppers in California face a predictable set of problems. Aphids, especially green peach aphids, are the most common insect pest and can colonize new growth rapidly in warm weather. A strong spray of water knocks most of them off; insecticidal soap is effective for heavier infestations. Aphids also vector viruses, so controlling them early matters. Spider mites show up in hot, dry Central Valley summers; the mites thrive in dusty, water-stressed plants, so adequate irrigation and keeping the garden floor clear of debris are the best preventives. Corn earworm moths sometimes lay eggs on pepper pods late in the season, and the caterpillars bore in and cause rot. Bt (Bacillus thuringiensis) sprays applied when moths are active give good control.
Phytophthora root rot is the most serious disease threat in California soils, particularly in heavier soils with poor drainage or in seasons with heavy early-spring rains. Raised beds with well-amended, fast-draining soil largely prevent it. Powdery mildew can appear on older leaves in the fall as temperatures fluctuate; removing affected foliage and improving airflow usually contains it. Bacterial spot shows up in warm, humid microclimates near the coast; copper-based fungicides applied preventively during wet periods help. UC ANR Publication 7244 covers integrated pest management protocols for California pepper production in more detail, and is worth reading if you are scaling up to a small farm.
What kind of yields to expect
For home gardeners in the Central Valley and Southern California, a healthy NuMex Big Jim or Joe E. Parker plant in good soil can produce 15 to 30 large pods per season, sometimes more in a long growing season. At the small-farm scale, California commercial production for New Mexico-type chiles runs roughly 10,000 to 20,000 pounds of green pods per acre under irrigated conditions, and specialty growers in the San Joaquin Valley have reported figures in that range. For reference, NMSU's breeding trials list dry red chile yields for certain NuMex lines at benchmarks like 7,781 pounds per acre under dryland production in New Mexico, which is considerably lower than California's irrigated potential. The NMSU cultivar circular 'blank" rel="noopener noreferrer">The Chile Cultivars of New Mexico State University, 1913–2022 (NMSU CR‑706)' reports a single‑harvest dry red chile yield of 7,781 lb/acre for the NuMex 'NuMex Sweet' line. Coastal gardens with cool summers will produce fewer pods than inland gardens, but pod flavor in cooler conditions can actually be quite good because slower maturation concentrates sugars and capsaicin.
Harvesting, roasting, and preserving your Hatch chiles
When and how to harvest
Green harvest is the traditional Hatch-style pick: pods are fully sized (6 to 10 inches depending on cultivar), firm, glossy, and dark green. This is typically 75 to 90 days after transplanting for most NuMex types. If you leave pods on the plant, they will turn red over the next 4 to 6 weeks, becoming sweeter and more complex in flavor; red pods are excellent for drying into chile colorado or grinding into powder. Cut pods from the plant with scissors or a sharp knife rather than pulling, which can break branches.
Roasting for that classic Hatch flavor
Roasting is what separates Hatch chiles from generic poblanos in flavor and texture. The goal is to char the skin completely, steam the pod, and then peel away the papery outer layer to reveal the sweet, smoky flesh underneath. The most practical home method is a gas stovetop burner or a very hot broiler set to the highest setting with chiles placed 2 to 3 inches from the element. Turn pods with tongs every 2 to 3 minutes until the skin is blackened on all sides. Immediately transfer to a bowl and cover tightly with plastic wrap or a lid for 10 to 15 minutes to steam. The skin then rubs off easily under cool running water. Commercial Hatch roasters use a rotating wire drum over a propane flame, the same setup you see at farmers markets and grocery stores every fall. If you have a large harvest, a long-handled grill basket over a high-heat gas grill roasts 20 to 30 pods at a time.
Preserving and storing your harvest
Freezing is by far the simplest and most effective preservation method. Roasted, peeled, and cooled chiles can be bagged in quart freezer bags with the air pressed out and stored for 12 months with virtually no quality loss. UC ANR Publication 8004 on safe pepper preservation recommends freezing as the best method for retaining flavor and texture. See Peppers: Safe Methods to Store, Preserve, & Enjoy (UC ANR publication listing and downloads) for tested freezing, drying, pickling, and canning recommendations. For raw green pods, refrigerate unwashed in a paper bag for up to 2 weeks. Drying works beautifully for red-ripe pods: thread them on string as ristras, or use a food dehydrator at 135°F until completely brittle (12 to 24 hours depending on wall thickness). Ground dried red Hatch chiles make an excellent powder. For canning, be aware of food safety: the National Center for Home Food Preservation is clear that salsas and mixes containing peppers must reach a final pH of 4.6 or below for safe boiling-water canning. Pure roasted peppers without added acid are a low-acid food and must be pressure-canned (10 pounds of pressure, 35 minutes for pints) to be shelf-safe. When in doubt, freeze instead; it is safer and produces better flavor.
Troubleshooting common problems
- Flowers dropping without setting fruit: Usually high night temperatures (above 70°F in summer) or very high daytime heat above 91°F. Use shade cloth, increase irrigation, and wait; plants often resume setting when temperatures moderate in late August or September.
- Pale, yellowing leaves: Likely nitrogen deficiency, especially in sandy coastal soils. Side-dress with a balanced fertilizer and water it in well.
- Thin-walled pods with poor flavor: Inconsistent irrigation is the most common culprit. Switch to drip irrigation and keep soil moisture steady throughout pod development.
- Wilting despite adequate water: Check for Phytophthora root rot, especially after wet spells or in heavy soil. Pull an affected plant and look for blackened, soft roots. Improve drainage and consider raised beds for future plantings.
- Pods not ripening red before fall frost: Switch to a faster-maturing cultivar next year. This season, cover plants with a floating row cover overnight to extend the season by 2 to 4 weeks.
- Stunted plants after transplanting: Soil temperature was probably below 60°F at planting time. Use black plastic mulch next year and wait until the soil has genuinely warmed.
- Curled or distorted new growth: Aphid colonies feeding on shoot tips. Inspect closely, spray with water or insecticidal soap, and check for ant activity (ants farm aphids and will bring them back if not managed).
What if your site really is not suitable?
If you are in a deep coastal fog zone where summer highs rarely break 70°F, or at high elevation with fewer than 90 frost-free days, a pure Hatch-type chile may disappoint. In those cases, consider Padron peppers, which ripen in cooler conditions than NM types, or use a greenhouse or cold frame to extend and intensify your season. If you're exploring season-extension options like greenhouses, you might also search 'can you grow hops in a greenhouse' to learn whether hops can be cultivated successfully in protected environments. Large dark containers moved into a south-facing greenhouse or sunroom at night can create a warm-enough microclimate even in places like San Francisco's Inner Sunset. If you enjoy growing other specialty crops in challenging California climates, the same microclimate thinking applies to crops like longan and goji berries, which also push the edges of California's diverse growing conditions. For more on that topic, see our guide on can you grow longan in California for climate, cultivar, and care advice. For specifics on cultivating goji in the state, see can you grow goji berries in California. For guidance on cultivating a different specialty crop in a cooler, variable climate, see can you grow hops in michigan for practical tips on hop varieties and season extension. If you're curious about growing other unusual plants in cool climates, see can you grow agave in Michigan for guidance on cold-hardy agave options and winter protection. If you're also wondering 'can you grow agave in California', see our guide on can you grow agave in California for climate and microclimate tips. For guidance on where agave thrives in the United States, see can you grow agave in the US.
Your next steps
If you are reading this in fall or winter, order your NuMex Big Jim, Joe E. Parker, or NM 6-4 Heritage seeds now from the NMSU Chile Pepper Institute or a reputable California-based seed company. Get your heat mat and seed trays ready. Look up your zip code's last frost date through NOAA, count back 8 weeks, and mark that indoor sow date on your calendar. Prep your raised bed or containers this fall so the soil is ready in spring. Most California gardeners who try Hatch chiles once become annual growers; the flavor of a home-roasted chile from your own garden is genuinely different from anything you can buy, and the satisfaction of producing something the state of New Mexico claims as its own in your California backyard is its own reward.
FAQ
Can you reliably grow New Mexico–type “Hatch” chiles in California, and how does feasibility differ by region (coastal, Central Valley, southern, mountain, desert)?
Yes — New Mexico–type (Hatch) chiles can be grown across California, but reliability and management needs vary by region. Summary by region: - Central Valley: High feasibility. Long warm season, moderate nights in many areas, good heat-unit accumulation; most reliable for fruit set and multiple harvests. - Southern California (coastal valleys and inland basins): High to moderate feasibility. Inland areas (Riverside, San Bernardino valleys) do well; coastal marine zones with cool summers may have slower set and smaller yields unless planted in warm microclimates or grown in containers under protection. - Coastal (cool coast, fog belts): Moderate to low-feasibility without site selection or season-extension. Summer fog and cool nights reduce fruit set; choose warm microclimates (south-facing slopes, heat-reflective walls) or use season extension (hoop houses, black plastic, row cover). - Mountain areas / high elevation: Low to moderate. Shorter growing seasons and early/late frosts make it more difficult; possible in lower-elevation foothills or with season extension/greenhouse. - Desert (hot inland deserts): Moderate to high if heat management is used. Very hot daytime or high night temperatures (>33°C day or sustained nights ≈24–25°C+) can reduce fruit set; choose planting dates to avoid hottest midsummer bloom or provide shading/irrigation cooling. Practical temperature thresholds to plan by: optimal daytime ~21–27°C (70–80°F) for best fruit set; daytime maxima near/above ~33°C (91°F) and night temperatures ≈24–25°C (75–77°F) or higher increase blossom drop and reduce fruit set. Use local last‑frost/first‑frost dates (NOAA/NCEI) and 30‑year normals (PRISM) to select planting windows and microclimates.
Which New Mexico/Hatch‑type cultivars are recommended for California, and where can I source seed or transplants?
Recommended cultivars (proven New Mexico/Hatch‑type, with different pod sizes/heat): - NuMex Big Jim — large, mild (commonly used for roasting/stuffing). - NuMex Sandia / Sandia Select — medium heat, classic New Mexican blocky pods. - NuMex Joe E. Parker — popular for large fruit and roasting. - NuMex Centennial and other NuMex lines for higher heat or disease resistance. Choose cultivar based on desired heat (SHU) and pod size. Sources: - University lines: New Mexico State University (Chile Pepper Institute/NuMex releases) — check CR‑706 cultivar list. - Reputable seed companies: major mail-order and local seed suppliers (search for named NuMex lines). - Local nurseries/farm suppliers in the Central Valley and southern CA often carry transplants in summer. When buying, prefer certified seed or reputable suppliers and ask for the exact NuMex/NM‑type name.
How do I schedule seed starting and transplanting in California tied to frost dates and microclimates?
General rules: - Start seeds indoors 6–8 weeks before the expected transplant‑out date (extension guidance commonly uses 6–8 weeks for peppers). - Transplant outdoors after the last spring frost and after soil daytime temps consistently >60°F (15–16°C) and night temps >50–55°F (10–13°C). Use your local last‑frost date (NOAA/NCEI) and adjust for microclimate: plant earlier in warmer inland microclimates, later near cool coast or high elevation. Region‑specific timing examples (adjust to county-level frost dates): - Central Valley: transplant mid‑April to early May for a full summer crop; in warmer areas you can transplant as early as late March. - Southern inland: transplant March–April; coastal/san Diego area may transplant late March–May depending on site. - Coastal cool zones: transplant late April–June or use protected microclimates/season extension to achieve ripening. - Mountain/high elevation: wait until late spring/summer when frost risk is over; consider greenhouse starts and early-season protection. - Desert: avoid transplanting into peak heat — either plant earlier in spring to establish before mid-summer heat or transplant later and protect bloom with shade. Practical step: find your 30‑year last frost/first frost and count back 6–8 weeks for seed start; plan a 6–9 week transplant nursery period (finish size) per standard transplant production guidance.
Step‑by‑step growing instructions (soil, sun, spacing, irrigation, fertilization, container vs field, season extension)
Soil and site: - Full sun (6–8+ hours daily). Warm, well‑drained loam or amended soils; raised beds or containers warm faster in cool regions. - pH 6.0–7.0 ideal. - Soil test first and correct P/K or pH as needed. Spacing and planting: - Space 18–30 inches (45–75 cm) between plants in rows 30–48 inches (75–120 cm) apart for field plantings. Closer spacing for intensive beds or containers. - For larger NuMex types, use 24–30 inches between plants. Irrigation: - Drip irrigation or soaker lines recommended to keep foliage dry and water delivery consistent. - Use ET‑based scheduling (CIMIS + crop coefficient Kc) or monitor soil moisture — peppers prefer even moisture; avoid prolonged drought or waterlogging. Fertilization: - Base fertilizer on soil test; as a practical starting range for field growers, many systems use ~120–200 lb N/acre as benchmarks (adapt to soil test and local extension guidance). - Use split N applications (starter, early fruit set, mid-season) and provide calcium to prevent blossom end rot. Containers: - Use 5+ gallon (20 L) containers for large types, quality potting mix, and a regular fertilizer program (slow‑release + periodic liquid feed). Season extension / protection: - Use black plastic mulch to warm soil in cool sites. - Row covers, low tunnels, or unheated greenhouse for earlier start and improved set in cool coastal or mountain areas. - Shade cloth or evaporative cooling in hot deserts during extreme heat to protect bloom. Seedling production: - Germinate 7–14 days; grow transplants at ~65–75°F day / 60–65°F night; finish 6–9 weeks before transplant out.
What yields and realistic expectations should I plan for (home garden and small‑scale/acreage)?
Yields vary with cultivar, fertility, water, and climate. Benchmarks: - Small home garden: expect 2–8+ lb (0.9–3.6 kg) per plant over a season for healthy, well‑managed NuMex types; large plants in good sites can exceed this. - Small‑scale/market yields: informed by NMSU breeding results (example NuMex Sweet single‑harvest dry red yield reported ~7,781 lb/acre for some lines) and typical commercial pepper yields. Realistic small‑farm ranges for green/hydrated fresh chile can be several thousand lb/acre depending on system; use local trials and soil/fertility management to refine expectations. For planning: use plant count, expected lb/plant (home) or lb/acre (farm) and factor in losses for blossom drop, pest loss, and unequal maturation.
Common pests and diseases in California and simple integrated control measures
Common pests: aphids, thrips, whiteflies, spider mites, pepper maggot/flea beetles (region dependent), cutworms. Common diseases: bacterial spot, Phytophthora root rot, Fusarium/Verticillium wilts, blossom end rot (physiological). Integrated controls: - Cultural: crop rotation (avoid Solanaceae in same bed for 2–3 years), good sanitation, remove infected debris, avoid overhead irrigation, proper plant spacing for airflow, and mulch. - Monitoring: scout weekly; use yellow sticky cards for thrips/whitefly. - Biological/chemical: release or conserve natural enemies (lady beetles, lacewings, predatory mites). Use insecticidal soaps or spinosad for aphids/leaf miners where label allows. For thrips and to control tospoviruses, control vectors early. - Disease-specific: use resistant varieties if available; avoid poorly drained soils (Phytophthora); use copper or approved bactericides for bacterial spot as recommended by UC ANR; correct calcium and irrigation practices to reduce blossom end rot. - IPM principle: start with cultural and biological methods; apply targeted insecticides/fungicides only when thresholds are exceeded and follow label/extension guidance.
Next Articles
Can You Grow Longan in California? Zones, Tips, and Next Steps
Can you grow longan in California? Learn zones, best regions, container tips, winter freeze protection, and realistic fr
Can You Grow Hops in a Greenhouse? Full Guide
Learn if and how to grow hops in a greenhouse, with climate fit, setup, care, and troubleshooting for first cone harvest
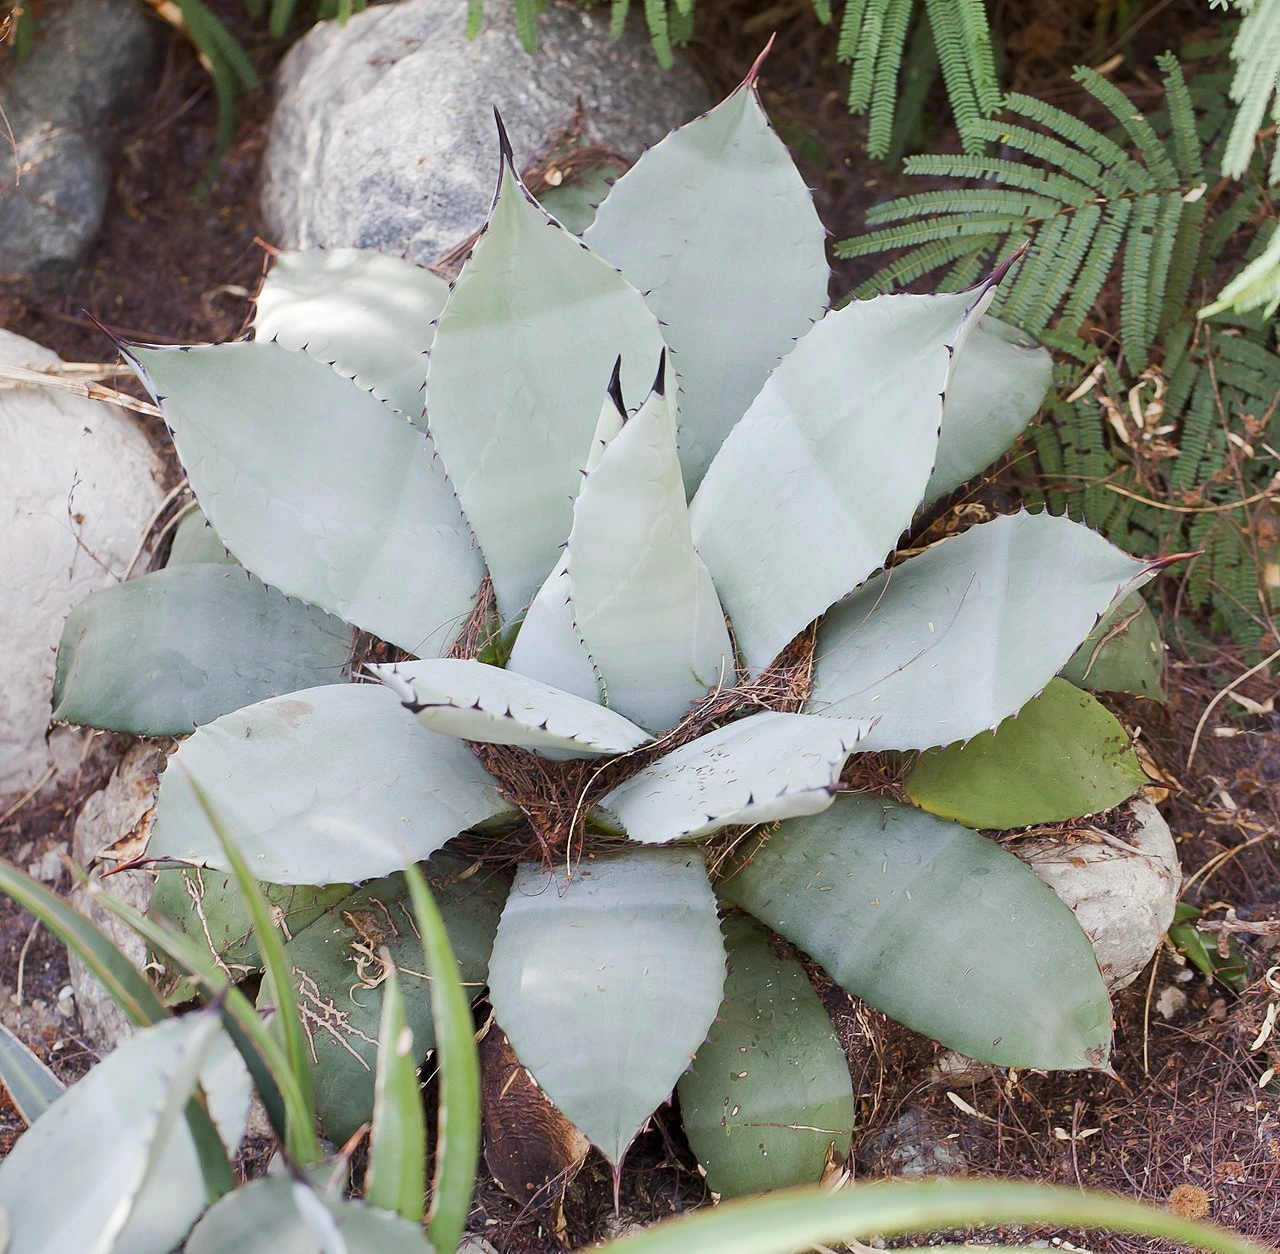
Can You Grow Agave in California? Best Species, Care, Zones
Find if you can grow agave in California, which species fit your zone, and exact care tips for cold, frost, and drainage