
Yes, you can absolutely grow hops in Canada. Hops (Humulus lupulus) are cultivated commercially and in home gardens across British Columbia, Alberta, Saskatchewan, Manitoba, Ontario, Quebec, New Brunswick, and Prince Edward Island. The plant is cold-hardy enough to survive winters down to about -25°C when the crown is covered by soil or snow, which puts most of southern Canada well within range. What you need to match is your local growing season length and heat accumulation to the variety you choose, not just your province. For related guidance on planting root crops in Canadian climates, see can you grow yams in Canada. For guidance on a very different warm‑season vine, see the can you grow chayote in Canada guide. Published trials report total-season Growing Degree Day (GDD) accumulations of roughly 1,700–2,600 °C·days to reach cone maturity, so plan variety selection to match local GDD availability Hops (Humulus lupulus L.) as a Novel Multipurpose Crop for the Mediterranean Region (Rossini et al., Agriculture, MDPI, 2021).
Can You Grow Hops in Canada? A Region-Aware Grower's Playbook
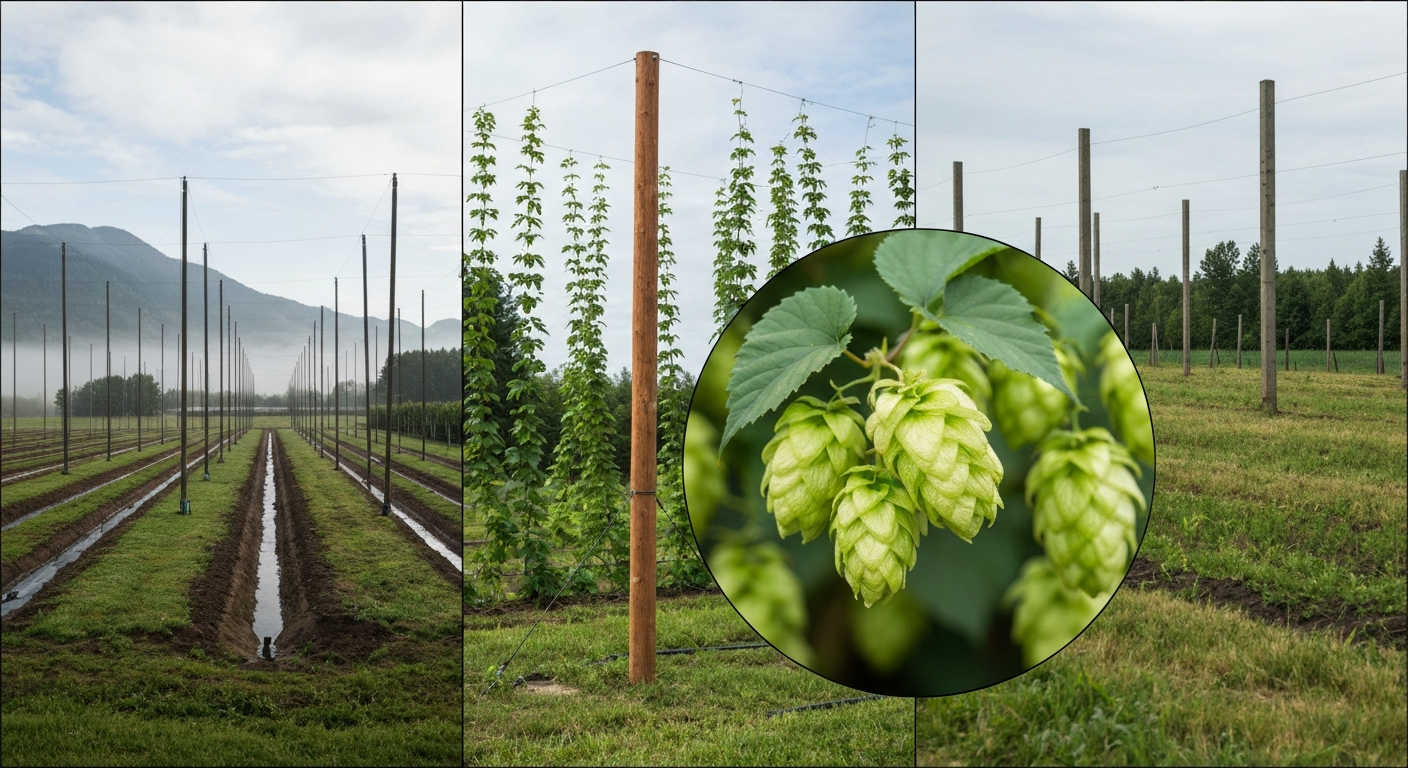
Quick feasibility checklist for your exact site
Before you order rhizomes, run through these five site factors. Zone alone does not tell the whole story, and a poor site in Zone 6 can underperform a well-chosen site in Zone 4.
- Hardiness zone: Hops grow reliably in zones 3 through 8. Check Natural Resources Canada's Plant Hardiness Site for your exact map location, not just your city.
- Frost-free season: Most hop varieties need at least 120 frost-free days to produce a meaningful cone crop. Shorter seasons push you toward early-maturing cultivars like Cascade or Crystal.
- Heat accumulation (GDD): Hop varieties need roughly 1,700 to 2,600 growing degree days (method and base temperature vary) to reach cone maturity. Use the Climate Atlas of Canada to pull GDD figures for your area.
- Space and vertical clearance: A mature hop bine wants at least 14 feet of vertical support and a deep, uncompacted root run. Crowded urban lots or heavy clay subsoil are the biggest practical limiters.
- Water and drainage: Hops like consistent moisture but absolutely hate waterlogged roots. A site with good drainage and access to irrigation during dry stretches is a must.
- Wind exposure: Strong prevailing winds can shred bines and collapse trellises. A south or southwest-facing slope with a windbreak on the north side is close to ideal for most Canadian locations.
- Microclimate bonuses: South-facing slopes, proximity to large bodies of water, and urban heat-island effects can each add meaningful frost-free days and GDD to what a regional zone map suggests.
Climate and hardiness by province
Canada's hop-growing potential varies enormously from coast to coast. Here is a province-by-province read on what you are working with.
| Province | Typical Zones (south) | Frost-free days (approx.) | Feasibility notes |
|---|---|---|---|
| British Columbia | 6b–8a (Fraser Valley, Okanagan) | 160–200+ | Best commercial hop region in Canada. Long season, mild winters, ample irrigation in dry inland valleys. Disease pressure (downy mildew) is the main challenge. |
| Alberta | 3a–5b (south) | 100–130 | Short but intense summers work for early varieties. Cold winters are manageable with good soil cover. Prairies get strong winds; trellis anchoring is critical. |
| Saskatchewan | 2b–4b (south) | 100–120 | Marginal in northern areas. Southern Saskatchewan river valleys with GDD data from the Climate Atlas can support early-maturing varieties. Winter protection is essential. |
| Manitoba | 2b–4b (south) | 110–125 | Similar to Saskatchewan. Winnipeg-area growers report success with Cascade and Centennial. Urban heat island helps in the city. Deep snowpack through winter is actually a crown protector. |
| Ontario | 5a–7a (south) | 140–180 | Strong hop culture, especially in southwestern Ontario. OMAFRA has published variety guides specifically for the province. Humid summers increase disease pressure; choose resistant varieties. |
| Quebec | 3b–5b (south) | 120–155 | Southern Quebec (Monteregie, Eastern Townships) supports commercial and hobby production. Short seasons north of the St. Lawrence push you to the earliest varieties. |
| New Brunswick | 4a–5b | 120–145 | Coastal moderation helps. Downy mildew and cool wet springs are the main challenges. Cascade performs well here. |
| Prince Edward Island | 5a–6a | 130–155 | Warmer than its latitude suggests thanks to maritime influence. Small-scale production is active. Drainage is the primary site concern given heavy clay soils in parts of the island. |
| Nova Scotia | 5a–6b (Annapolis Valley) | 140–160 | Valley microclimates are excellent. Similar management to New Brunswick; disease monitoring matters in wet years. |
| Newfoundland | 4a–5a (coastal) | 100–130 | Feasible in sheltered southern coastal sites. Season length limits variety choice sharply. Treat as an experimental project north of the Avalon Peninsula. |
One thing I keep coming back to: province-level averages hide enormous variation. A south-facing hillside in the Okanagan or the Annapolis Valley is a completely different growing environment than a flat, exposed field 50 km inland. Download the Climate Atlas of Canada and run the GDD and frost-free-day maps for your actual postal code before committing to a variety. If you're exploring other cold-climate fruit options, see our short guide on growing kumquats in Canada for site and hardiness tips relevant to small-scale citrus attempts.
Best hop varieties for Canadian conditions
AAFC and provincial resources consistently flag a handful of cultivars that perform across multiple Canadian regions. The traits to prioritize are cold hardiness (crown survival through freeze-thaw cycles), early to mid maturity (so you beat your first fall frost), and disease tolerance (especially to downy mildew and powdery mildew, which pressure humid regions hard).
| Variety | Maturity | Cold hardiness | Disease tolerance | Best for |
|---|---|---|---|---|
| Cascade | Early-mid (Aug) | Excellent (Zone 3) | Moderate | Across Canada; the most widely grown home-garden hop in the country |
| Centennial | Mid (late Aug) | Excellent (Zone 3) | Moderate-good | Ontario, BC, Alberta, Manitoba; very vigorous |
| Chinook | Mid (late Aug–Sept) | Good (Zone 4) | Good | BC, Ontario, southern prairies; high alpha, dual-purpose |
| Nugget | Early-mid (Aug) | Good (Zone 4) | Good (powdery mildew) | Short-season regions; reliable performer in Quebec and Maritimes |
| Galena | Mid (late Aug) | Good (Zone 4) | Good | BC and Ontario commercial production; high alpha acid |
| Crystal | Early (early Aug) | Good (Zone 4) | Moderate | Best pick for short-season sites in Alberta, Saskatchewan, and Quebec |
| Willamette | Mid (late Aug) | Good (Zone 4–5) | Moderate | BC and Ontario; noble-type aroma, popular with craft brewers |
| Hallertau Mittelfrüh | Mid (Aug–Sept) | Moderate (Zone 5) | Poor (downy mildew susceptible) | Best in drier BC interior; avoid in humid east unless vigilant |
For hobby brewers in Ontario, the OMAFRA brewer's guide to Ontario-grown hop varieties is one of the most useful local documents available and lists performance data from actual provincial trials. See the 2022–2023 Brewer’s guide to Ontario‑grown hop varieties (OMAFRA / Ontario government) for provincially focused performance data and variety notes. If you are in a shorter-season province, lean hard toward Crystal, Nugget, or Cascade. Avoid late-maturing European varieties like Hallertau in the Maritimes or Prairies; they rarely finish before the first killing frost.
Rhizomes, crowns, or potted plants: which to buy
This is a decision most new growers do not think hard enough about, and it matters both for establishment success and for disease risk. Here is the honest breakdown of each option.
| Planting stock type | Pros | Cons | When to choose |
|---|---|---|---|
| Certified rhizomes (dormant) | Cheap, widely available in late winter, easy to ship and store short-term, traditional choice for home growers | No visible foliage to assess plant health; higher disease risk if source is not certified; can dry out if stored poorly | Best choice for most home gardeners if sourced from CFIA-compliant or certified-clean suppliers; plant early spring after last frost |
| Potted transplants (greenhouse-started) | Established root system, visible health at purchase, faster first-year growth, lower transplant shock | More expensive, limited variety selection, harder to ship, need to harden off before planting outdoors | Best for short-season regions (Alberta, Saskatchewan, northern Quebec) where you want a head start; buy locally if possible |
| Tissue-culture / micropropagated | Highest disease-free guarantee, especially for Hop Latent Viroid (HLVd) and other viroids that are increasingly found in Canadian stock | Expensive, rare for home-grower market, requires careful acclimatization | Worth seeking out if you have had plant health failures or are starting a small commercial plot; ask suppliers if their stock is CFIA/CNCP-certified |
The disease issue is real and worth taking seriously. AAFC's Crop Profile specifically calls out Hop Latent Viroid (HLVd) and other viruses in Canadian production. Always ask suppliers whether their stock comes through Canada's Nursery Certification Program (CNCP) or is otherwise tested clean. Cheap, uncertified rhizomes from unverified online sellers are how viroid problems spread from garden to garden.
Planting step by step
Timing by region
- BC coast and southern Ontario: plant rhizomes from late April to mid-May after the last killing frost has passed
- Alberta, Manitoba, Saskatchewan: wait until mid-May to early June; potted transplants started indoors in April reduce your risk in short-season zones
- Quebec and Maritimes: late April to mid-May in southern areas; first week of June in northern zones; check your last-frost date annually rather than relying on a fixed calendar date
- Newfoundland: early June for most sites; focus on containerized or potted stock to maximize your usable season length
Soil preparation
Target a soil pH of 6.5, which gives you the best nutrient availability for hops. The acceptable range is 5.8 to 7.5, but outside that window you will see nutrient lockout problems that no amount of fertilizer will fix. Get a soil test before planting. If your soil is too acidic (common in the Maritimes and parts of BC), work in ground limestone at the rate your test recommends. If it is too alkaline (parts of prairie soils), elemental sulfur applied the fall before planting gives it time to react.
Loosen soil to at least 30 cm (12 inches) depth. Hops send down a serious root system and will struggle in compacted or heavy clay subsoil. Work in 5 to 10 cm of compost before planting. Good drainage is non-negotiable: raised rows or slightly mounded beds help on sites with any tendency to pond water.
Spacing and planting depth
- Space plants 60 to 90 cm (24 to 36 inches) apart in a row
- Space rows at least 2.5 to 3 m (8 to 10 feet) apart to allow light penetration and air movement
- Plant rhizomes vertically with the bud end pointing up, about 2.5 to 5 cm (1 to 2 inches) below the soil surface
- Plant the same variety together; different varieties have different vigour and training rhythms that can make a mixed row difficult to manage
- In the first year, focus on root establishment rather than cone production; removing most flower shoots in year one actually helps the plant build the crown it needs for productive years two and three
Trellis and training options
Commercial Canadian hop yards use trellises 18 to 20 feet (5.5 to 6 m) tall. For a home garden, 14 to 15 feet (about 4.3 to 4.6 m) is the practical sweet spot: tall enough for good yields but manageable to build and harvest without scaffolding. Going shorter than 10 feet noticeably cuts cone production.
Common home-garden trellis approaches
| System | Height | Materials | Approximate cost (CAD) | Notes |
|---|---|---|---|---|
| Single pole with coir or jute strings | 14–16 ft | One 6-in diameter cedar or pressure-treated post per 2 plants, heavy-gauge top wire, biodegradable coir string | $80–$150 per post installed | Simplest setup; good for 1–4 plants; strings compost with spent bines at season end |
| A-frame trellis | 12–15 ft | Two angled posts anchored at base, cross-beam at top, strings descending | $200–$400 total | Good for small backyards; stable in wind; slightly lower yield than vertical |
| Fence-line post-and-wire system | 14–18 ft | Cedar or steel posts 10 ft apart, two horizontal wires (top and mid), coir or twine training strings | $150–$300 per 30 ft run | Best for growing a row of 4+ plants; efficient training and harvest access |
| Anchor-and-overhead-wire (commercial style) | 18–20 ft | Treated posts set 3–4 ft into ground, heavy top wire, individual training twine per bine | $500+ for a full row | Maximum yield; overkill for 1–6 plants but worth it for a dedicated hop garden |
In Canadian conditions, post depth matters more than it does in milder climates. Set posts at least 90 to 120 cm (3 to 4 feet) into the ground. Frost heaving and spring saturated soil can topple a post that is only surface-anchored. For prairie or Maritime sites with heavy wind or snow load, use concrete footing around each post base. Coir training string is my preference because you can cut the whole bine and string down at harvest and compost them together, which saves the tedious job of unwinding dead bines from wire.
Training the bines
Hops are bines, not vines: they climb by wrapping their stiff stems clockwise around a support rather than using tendrils. Once bines reach about 30 cm (12 inches), select the two or three strongest per plant and wrap them clockwise onto your training string by hand. Remove the rest at soil level. Train every few days during the rapid growth phase in June and early July; a bine can grow 20 to 30 cm in a single warm day and will tangle itself if you ignore it.
Seasonal care calendar
Spring (April to May, or May to June on the Prairies and in northern Quebec)
- Remove winter mulch gradually as soil temperatures consistently reach 5–7°C; uncover too early and late frosts can damage emerging shoots
- Cut all bines from last year's trellis strings and compost them; do not leave dead material on the ground as it harbours disease spores
- Conduct a 'crown pruning' (hilling): mound soil 5–8 cm over each crown, then scrape off the top 5–10 cm of the mound along with any shallow lateral roots; this reduces the tangled mass of small lateral roots and redirects energy to strong vertical bines
- Test soil pH and amend if needed; apply a balanced fertilizer (e.g., 10-10-10 or equivalent) at the rate indicated by your soil test results
- Install or inspect trellis hardware; replace any winter-damaged posts or wires before bines start growing
- Plant new rhizomes or transplants after last frost date for your region
Early summer (June to early July)
- Select and train 2–3 bines per plant onto strings; remove all others at ground level weekly for the first 3–4 weeks
- Keep the bottom 60–90 cm of the bine stripped of leaves and lateral shoots to improve airflow and reduce downy mildew splash from soil
- Apply a nitrogen-focused fertilizer (e.g., ammonium nitrate side-dress or compost tea) once bines are actively growing to support rapid vertical growth
- Water deeply 2–3 times per week in dry periods; hops need consistent moisture but the top few centimetres should be allowed to dry between waterings to discourage root rot
- Begin scouting for two-spotted spider mite, aphids, and early downy mildew symptoms (yellow angular leaf spots on upper surface, grey-purple sporulation beneath)
Mid-summer (July to early August)
- Bines should be at or near full height by mid-July in most Canadian regions; lateral shoots ('side-arms') carrying the cones will now extend horizontally
- Shift fertilizer to lower nitrogen and higher potassium as cone development begins; excess nitrogen at this stage delays maturity and increases disease susceptibility
- Scout intensively for spider mites (underside of leaves, fine webbing) and aphid colonies; heat and dry conditions spike mite populations fast
- Monitor for hop powdery mildew on cone bracts in BC and Ontario; white powdery coating is unmistakable
- In dry regions (BC interior, prairies), maintain consistent irrigation; water stress during cone fill reduces both yield and quality
Harvest (mid-August to late September, cultivar and region-dependent)
Canadian harvest runs from mid-August through late September depending on cultivar and location. Early varieties like Crystal and Cascade finish first; later varieties like Chinook and Willamette run into September. Do not harvest by calendar date alone. Ripe cones feel papery and dry, spring back when squeezed, and have a strong lupulin fragrance. If you cut a cone open, the lupulin glands should be bright yellow-gold rather than green or brown. Cones that feel wet or heavy are not ready. Wait another week and check again.
- Cut bines down to about 1 m (3 ft) above ground and pick cones from the cut bines on a table or tarp, rather than trying to pick while the bine is still on the trellis
- Dry cones immediately after harvest: a food dehydrator set to 35–40°C works well for small batches; spread cones no more than 5 cm deep for even airflow
- Cones are dry enough when the central stem (strig) snaps cleanly rather than bending; moisture content should be around 8–10% for stable storage
- Package dried hops in vacuum-sealed bags and store in the freezer; oxygen and warmth degrade alpha acids quickly
- Realistic yield for a healthy second- or third-year plant: 0.5 to 1.5 kg of dried cones; first-year plants rarely produce a meaningful harvest and that is normal
Fall and winter prep (September to November)
- After harvest, cut all remaining bines to about 15–20 cm (6–8 inches) above ground; do not cut to ground level as a short stub helps you locate and protect the crown
- Remove all plant debris from the hop yard and dispose of it away from the plot or hot-compost it; leaving disease-laden material in place invites problems next spring
- Apply a 15–20 cm layer of straw, wood chips, or shredded leaves over each crown before the ground freezes; this is especially important in zones 3 and 4 where air temperatures can drop below -25°C
- In Alberta, Saskatchewan, and areas with reliable deep snowpack, the snow itself provides significant crown insulation; mulch is still advisable in years with low snowfall or hard freeze before snow cover arrives
- Check trellis posts and top wires after any ice storms; repair or re-tension before freeze-up so the system is ready for spring
Pests, diseases, and keeping your plants healthy
Downy mildew (Pseudoperonospora humuli) is the most damaging disease in wet Canadian regions, particularly Ontario, BC, and the Maritimes. Infected 'basal spikes' emerge in spring with a silver-grey colour and upward-curling leaves; infected bines are stunted and distorted. Remove and destroy affected spikes immediately. Improve airflow by stripping lower leaves, avoid overhead watering, and choose tolerant varieties (Cascade, Chinook, Nugget) if your site is prone to wet spring conditions.
Powdery mildew is a secondary but real concern in BC and humid Ontario summers. It shows up as white powdery patches on leaves and cone bracts and is favoured by warm, dry days followed by cool nights. Potassium bicarbonate sprays and sulfur-based fungicides are practical options for organic management; conventional growers have more tools available.
Two-spotted spider mite is the most damaging insect pest across Canadian hop gardens. Mites explode in hot dry July and August weather. Early-season insecticidal soap applications and releasing predatory mites (Phytoseiulus persimilis) are effective. Check the undersides of leaves weekly from mid-June onward. Aphids (usually the hop aphid, Phorodon humuli) colonize growing tips and can transmit viruses; knock colonies off with a strong jet of water or use insecticidal soap early.
On disease-free planting material: Hop Latent Viroid (HLVd) is present in Canadian hop production and causes 'dudding,' where infected plants produce dramatically reduced and poor-quality cones. There is no cure for an infected plant. Starting with CFIA-compliant or CNCP-certified clean stock, and never taking cuttings from unknown plants, is your entire defence here.
Where to source rhizomes and plants in Canada
Domestic sources are strongly preferred for disease-risk reasons. Look for Canadian suppliers who can confirm their stock is tested or certified through the Canadian Nursery Certification Program. The Ontario Hop Growers' Association and BC Hop Growers maintain grower directories that often list propagative material sources. Several prairie and Maritime nurseries have begun offering hop rhizomes in late winter; search for them in January and February because stock sells out fast. When evaluating an online supplier, ask directly: is this stock HLVd-tested? If they do not know what you are talking about, buy elsewhere. For related guidance on growing other culinary shrubs in Canadian climates, see can you grow bay leaves in Canada for tips on cultivating bay laurel across provinces.
FAQ
Short answer: can you grow hops in Canada?
Yes. Hops (Humulus lupulus) grow successfully across southern regions of most Canadian provinces when you match variety to local growing degree accumulation and frost‑free season, pick a well‑drained, high‑sun micro‑site, and use clean planting stock with appropriate winter protection and a sturdy trellis.
How does Canadian climate and hardiness affect hop feasibility by province/zone?
General rules: hops need full sun, good drainage, and a frost‑free window long enough for the chosen cultivar to mature cones. Use your local Plant Hardiness Zone, frost‑free days, and GDD maps to decide. Province‑level guidance: British Columbia (southwest/Coastal/Fraser Valley): excellent—longer seasons and milder winters; Vancouver Island and lower mainland ideal. Alberta/Saskatchewan/Manitoba (southern plains): feasible in many southern sites with careful variety selection and winter protection; watch short seasons and low snowpack. Ontario/Quebec (southern): very feasible across much of the south; humid conditions require disease‑resistant varieties and sanitation. New Brunswick/PEI/Nova Scotia (southern coastal): feasible on sheltered sites—coastal moderation helps but humidity increases disease risk. Newfoundland/Labrador: limited—some sheltered coastal micro‑sites may work, but short seasons and cold winters constrain most varieties. Always check local GDD and frost‑free days against cultivar maturity requirements and prioritize sheltered south/southwest exposures or proximity to large water bodies for colder regions.
Which hop varieties suit Canadian conditions?
Choose by maturity (early/medium/late), disease susceptibility, and intended use (aroma vs bittering). Widely successful varieties: Cascade (aroma, adaptable, medium maturity), Centennial (aroma, medium‑late), Chinook (bittering/aroma, medium), Nugget (bittering, mid‑season), Galena (bittering, earlier), Crystal (aroma, earlier), Fuggle/Willamette (traditional aroma, cooler areas). In cooler/shorter‑season sites favor early‑maturing cultivars or those with documented lower GDD needs. In humid Ontario/Quebec/Maritimes, prioritize varieties with documented disease tolerance and start with certified clean stock.
How do I decide rhizomes vs crowns vs potted/tissue‑culture stock?
Rhizomes (dormant pieces) are the common, cost‑effective choice for home growers—plant in spring after last frost. Crowns (established root clumps) give faster production but cost more. Potted transplants are useful if you want a head start in short seasons. Tissue‑culture (micropropagated) stock provides the cleanest, disease‑free material but is pricier. Always source certified/clean material to avoid Hop Latent Viroid and viruses.
When and how should I plant hops (timing, soil prep, spacing)?
Timing: plant dormant rhizomes or crowns in spring after last frost and when soil warms (typically mid‑April to May in many southern sites). Soil prep: choose a site with full sun, deep loose loam, good drainage, pH ~6.5 (acceptable 5.8–7.5). Amend heavy clay with compost and coarse sand or build raised beds. Work in compost (2–4 in) and a balanced starter fertilizer. Planting: rhizomes vertically ~2–5 cm (1–2 in) below soil surface or horizontally 5–8 cm if instructed by supplier; water in. Spacing: home plant spacing 60–90 cm (24–36 in) between hills; commercial spacing wider (1–2 m rows). First year: focus on root and biner establishment—limit heavy cone removal to build crowns.
What trellis and training options work for Canadian home and small‑scale plantings?
Options by scale: Backyard (single vines): 3.5–4.5 m (12–15 ft) single pole/t‑frame or heavy cable with twine—sufficient for home yields. Small commercial: 5–6 m (18–20 ft) tall trellis with top wires and strings. Construction: set posts deep (≈1–1.2 m/3–4 ft) for wind and snow loads; use pressure‑treated poles or steel and a strong top wire. Twine/strings are wrapped clockwise around bine and attached to top wire. Alternative low‑maintenance: A‑frame/teepee for patios or espaliered trained lines for limited height. Heavier systems increase yield; shorter systems simplify harvest but reduce maximum output.
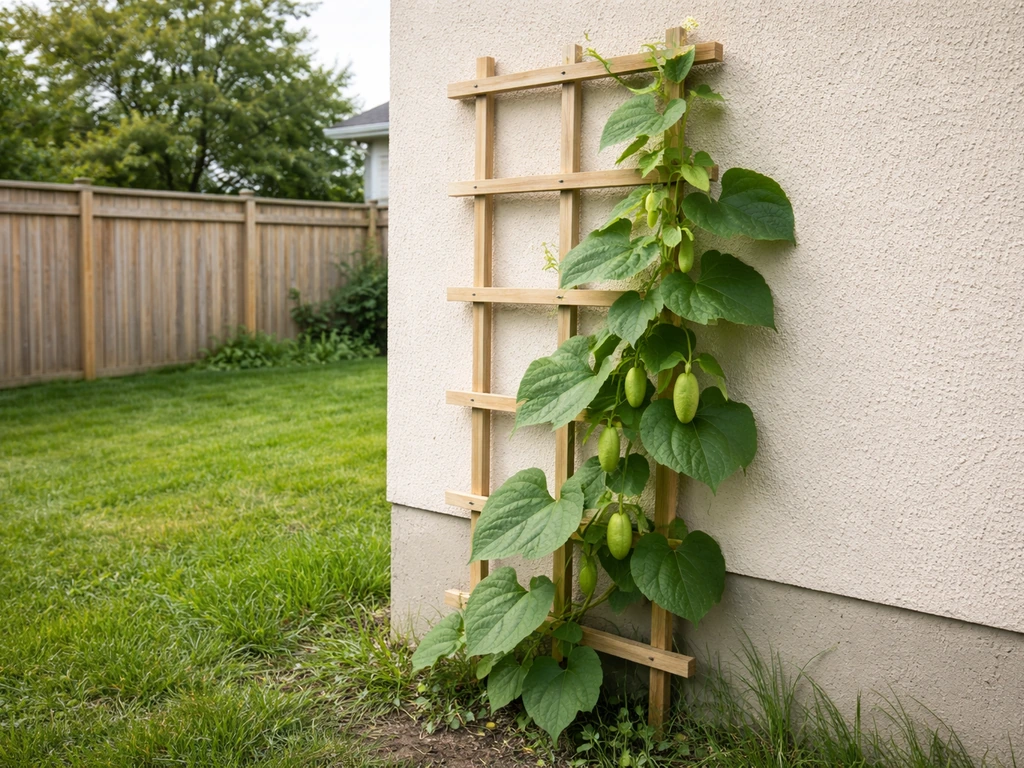
Grow chayote in Canada with region tips, indoor starts, trellising, care, harvest timing, and winter survival methods.
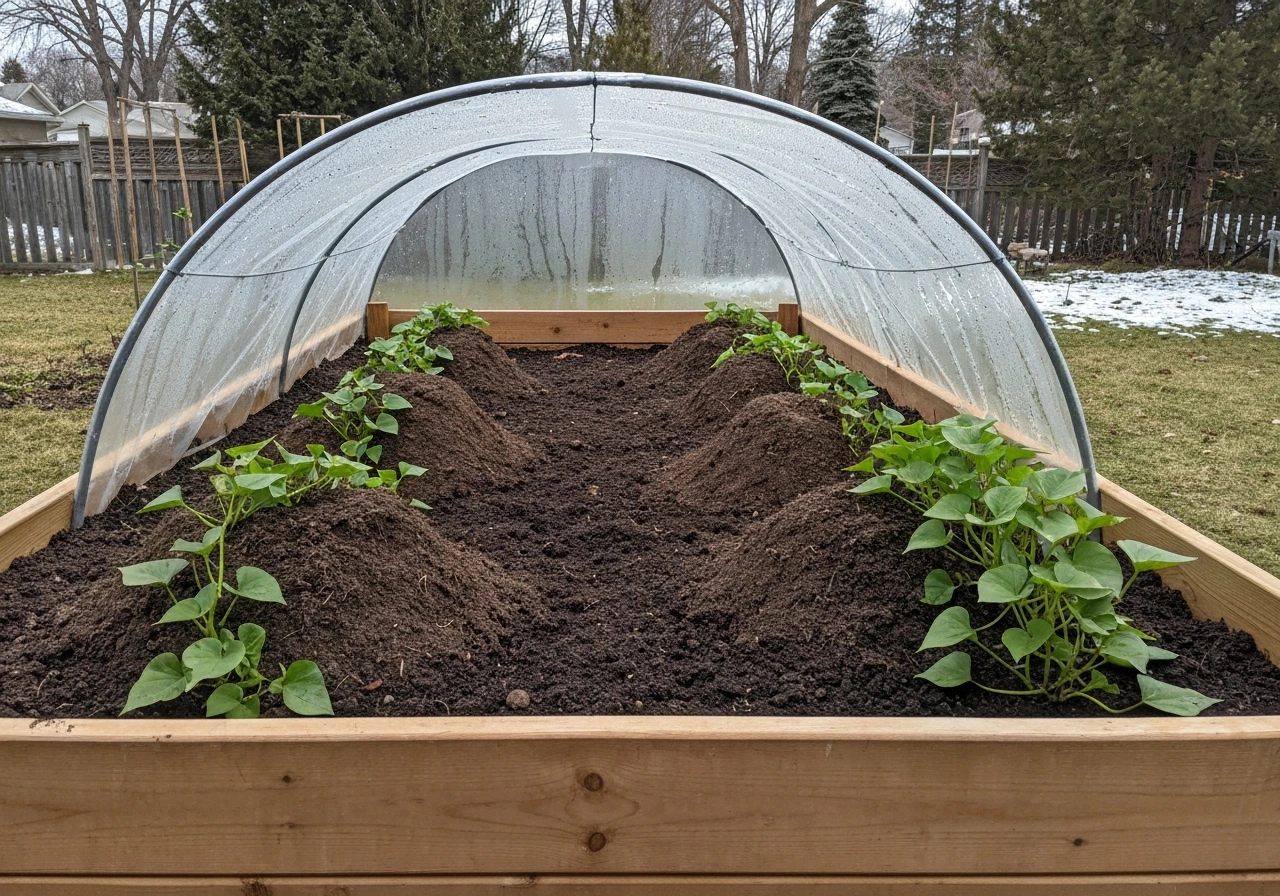
Grow sweet potatoes in Canada: which regions work, how to plant, protect frost, harvest, and cure for winter storage.
Can you grow agave in Canada? Practical region-by-region guide, hardy species, container tips & winter care.